 Does Manic Panic Work On Red Hair? An Experiment
 Is It Weird That I Want To Steal Kate McKinnon’s Ghostbusters Costume?
 10 DIY Projects I Can’t Wait To Make For My New Apartment
How To Make Temporary Tattoos From Real Dried Flowers
Saturday, April 11th, 2015
Flash tattoos are officially a thing. They’ve been trendy ever since Beyonce made them cool at the end of last summer, and they’re all over Coachella at this very moment. I really love the idea of showing off a tattoo that I can wash off later, but I just can’t get behind the “festival wear” thing. Plus…and call me a hipster/snob if you want…if everyone’s doing something…that makes me want to do it less.
When I saw gorgeous photos of dried flower “tattoos” during a recent Pinterest binge, I knew I had found a flash tattoo inspired DIY I had to try. It was the perfect compromise of festival style, dainty elegance, and originality. My results were everything I had hoped for. Check out how I did it below and learn how to make temporary tattoos from dried flowers at home.
To start off, I headed to the florist. I bought two potted African violets: one with pink flowers and one with dark purple. I figured if I ever wanted to do this again, I’d have a tattoo tree ready for me in my kitchen. They were only $4 a piece. I don’t have much of a green thumb, but maybe I will miraculously keep them alive.
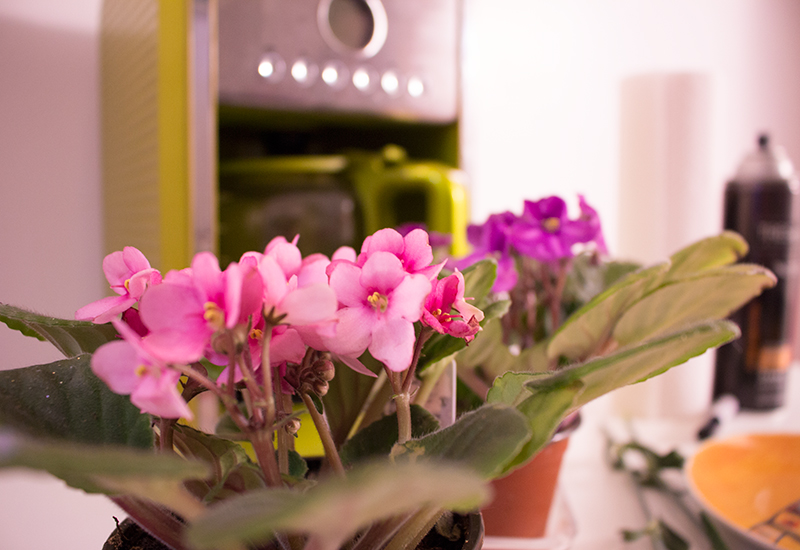
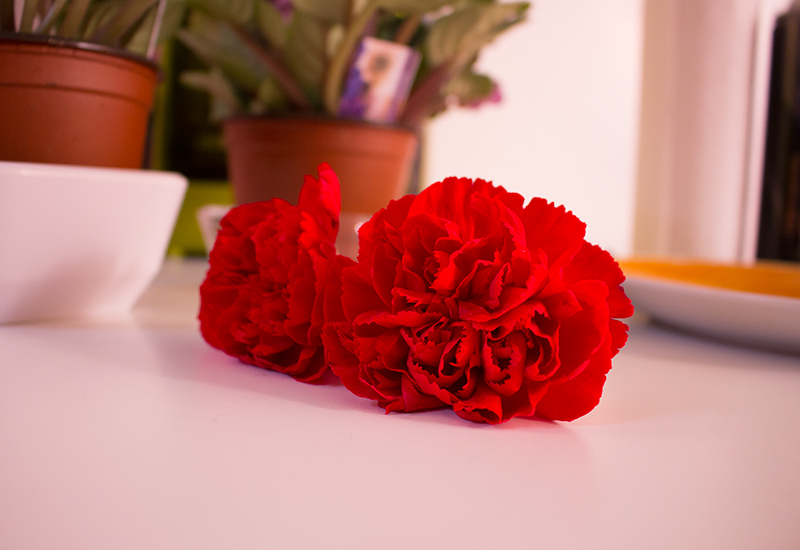
I also wanted some red in my fake tattoos, so I bought two red carnations. I ended up only using one of them for my arms. I felt pretty goofy buying flowers just so I could rip them apart, but, okay.
Pressing flowers the traditional way can take weeks. Instead of sticking my buds in a book and waiting, I dried them out in 30 seconds with a microwave. I put my flowers face down on a paper towel on top of a plate. Then I put another paper towel on top of the blossoms, and then pressed them down with another plate.

The carnations kept a lot more of their color during the drying process. The purple and pink flowers turned brown on the edges and looks a bit transparent. 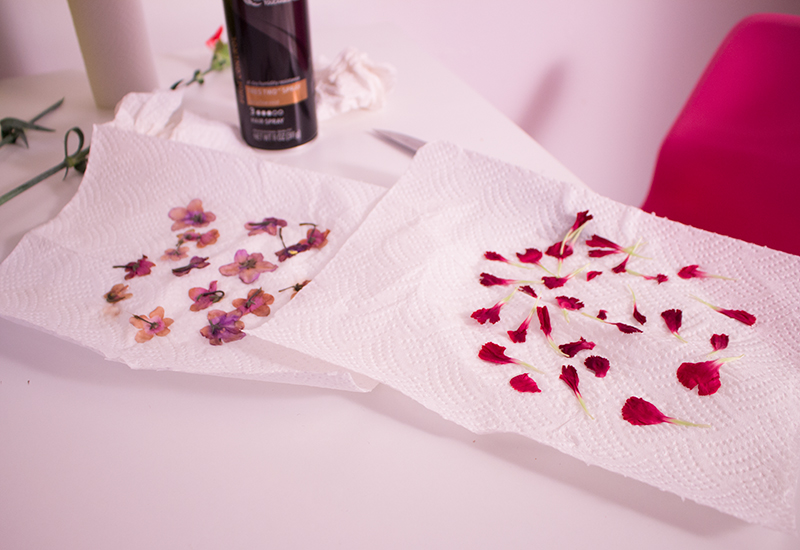
The petals on the carnations were much sturdier than the African violets. I thought it would be easier to let the violets dry a little bit on the paper towel before I pulled them off, (you know how things can be a little moist after you take them out of the microwave?) but that did not work. When using delicate flowers, the key is to take them off of the paper towels immediately, and transfer them right-side-up to a dry paper towel.
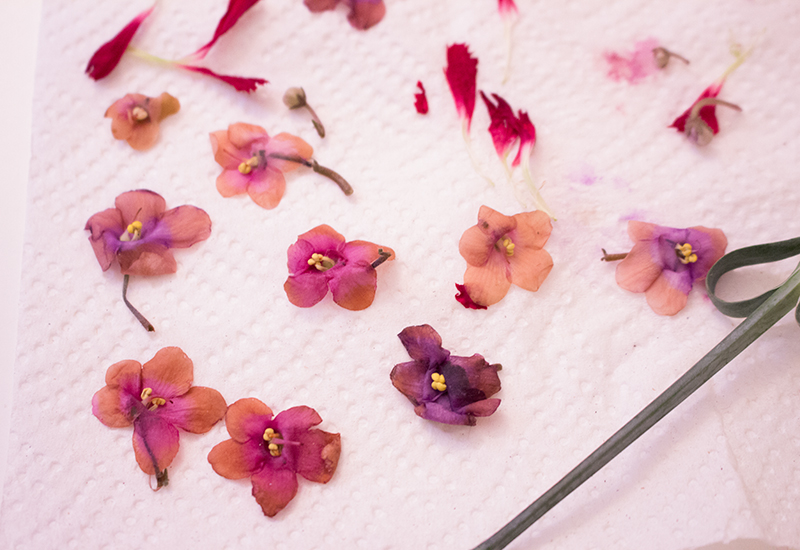
To adhere the flowers, I used brush-on eyelash glue. I painted a little bit on my skin and carefully patted the flower into place. On petals that didn’t quite stick, I used the eyelash glue like ModPodge and decoupaged them into place. After I finished my design, I sealed the flowers by spraying them with hairspray. Here’s how it finally turned out:
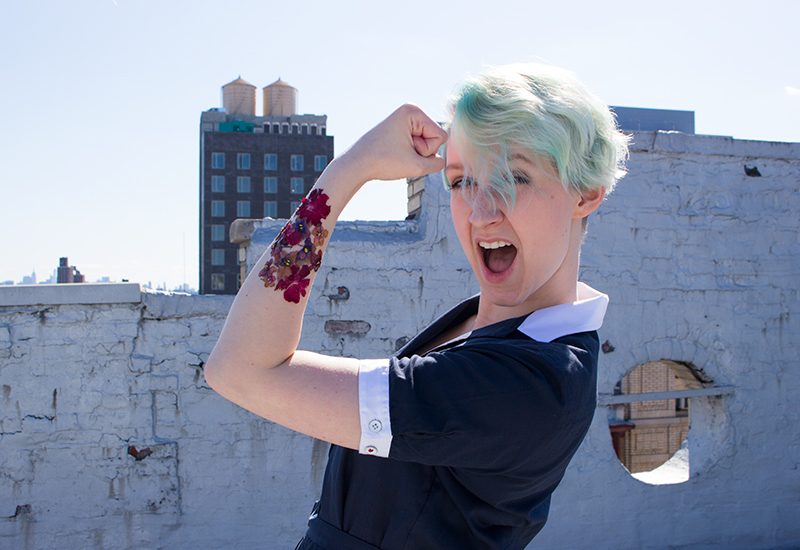
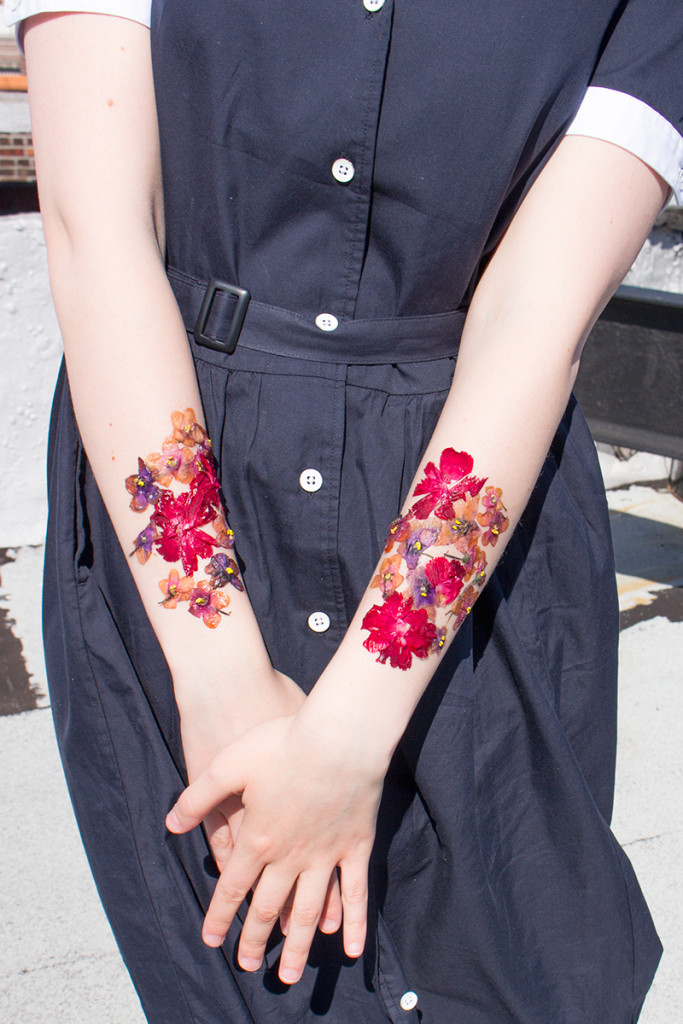
Even though the petals I used to make these tattoos were delicate, the finished product was anything but. They stayed on through wind, under my jacket, and took quite a bit of effort to eventually get off. If you don’t want to commit to having these glued on your arms all day, the tutorial that inspired my process suggests using vaseline to stick on the flowers. I for one will stick to eyelash glue for optimal durability. I’m looking forward to doing this again in the summer for outdoor parties, concerts, or days spent drinking cocktails in the sun.

Also, I am OBSESSED with this blue tea dress from Uniqlo’s Ines de La Fressange collection. I’d been eying it for awhile before purchasing, and it was definitely $50 well spent. It makes me feel like Audrey Hepburn…if Audrey Hepburn had mint green hair.
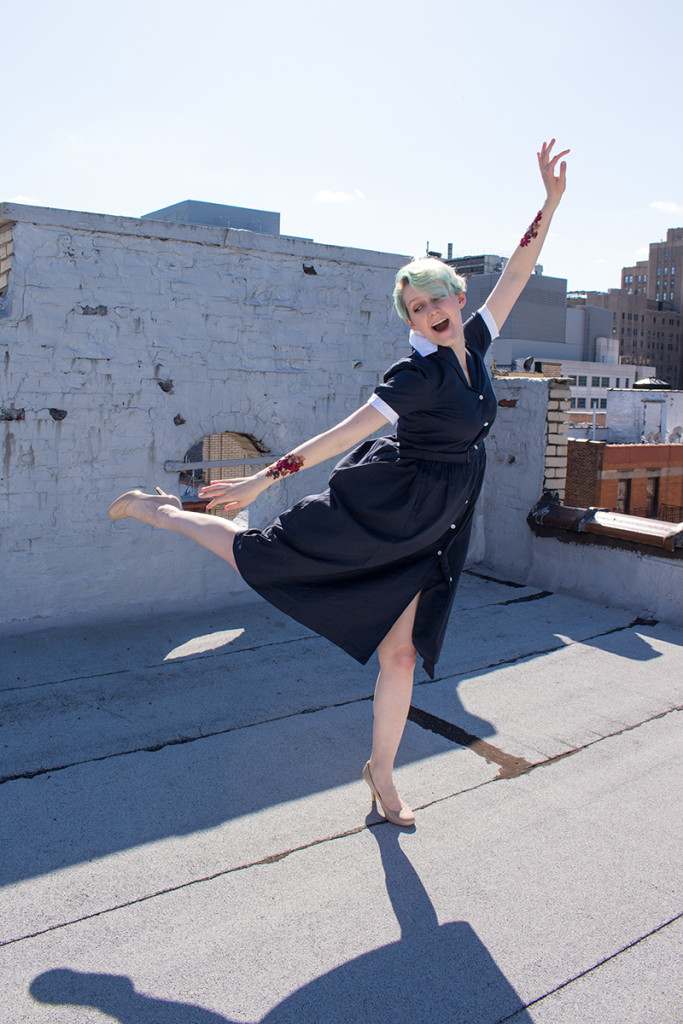
What do you think of my dried flower flash tattoos? Let me know in the comments.
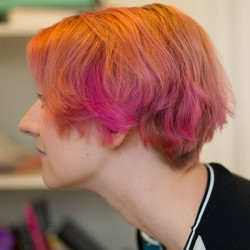
Pastel Colored Pixie Cuts That Prove Fairy Hair Is Better Than Mermaid Hair
Wednesday, March 25th, 2015
“Mermaid hair” is a thing right now. It is having a major moment. Ask any fashionable lady under age 30 who’s used Pinterest or Tumblr and she’ll know exactly what “mermaid hair” is. Made popular by rumored lip injection enthusiast Kylie Jenner, if you have “mermaid hair,” you have long, thick hair in a pastel or neon hue, invoking visions of shiny scaled mythical sea creatures. But as a short-haired lady who loves her some Manic Panic, I feel the need to make an official statement on mermaid hair. And that is, fairy hair is better.
Fairy hair is a term I am coining right now. When this blows up on Tumblr, credit me, please. If luscious-locked women get Princess Ariel as their mascot, then I’m calling Tinkerbell for those of us with pixies and short bobs. Tinkerbell is way sassier than Ariel anyway so, win-win for us.
To prove that colored and cropped is beautiful, check out the hair inspiration photos below. I know I’m going to have a hard time choosing which color I want to go for next.
Bright Blue
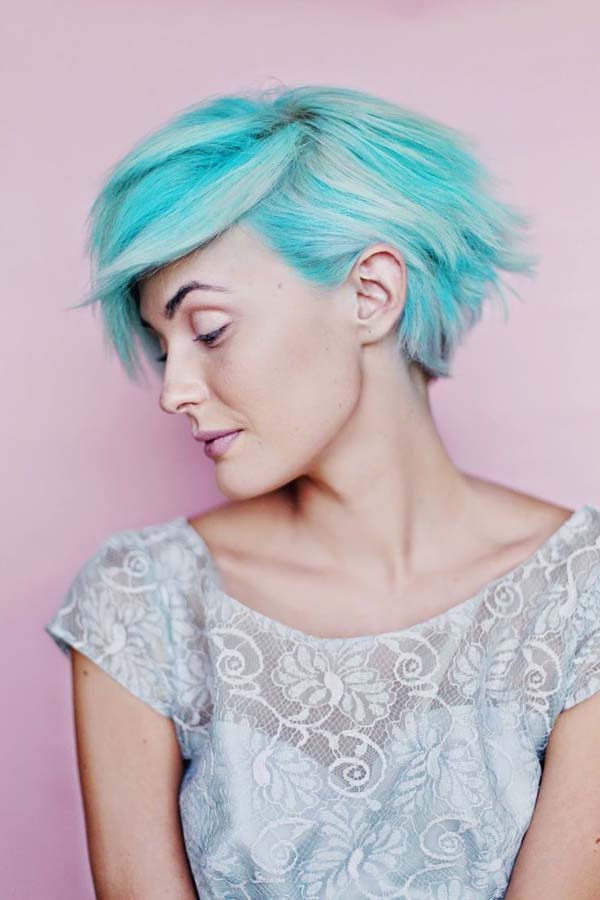
(source)
You can achieve this aqua color using Manic Panic’s Atomic Turquoise, but you might need a little bit of help getting it out of your hair later.
Cool Purple
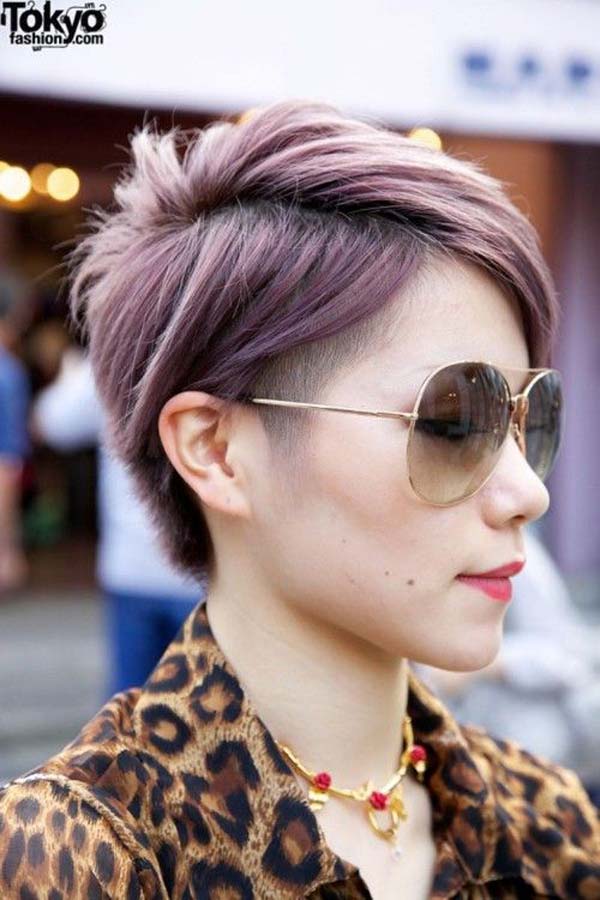
(source)
This purple tone has a cool, grayish hue to it. Silver hair is not just for grannies anymore and is way trendy right now. For a cool pastel purple, dilute Manic Panic’s Violet Night with white hair conditioner. If you’re looking for a warmer purple, go with Mystic Heather.
Royal Blue Highlights
(source)
Don’t want to dye your whole head? Try out a few streaks or highlights and see how you like it first! You can achieve this color with Blue Moon. Make sure to wrap your strands in plastic wrap after you paint on the dye, so it doesn’t leak into other strands of hair.
Lime Green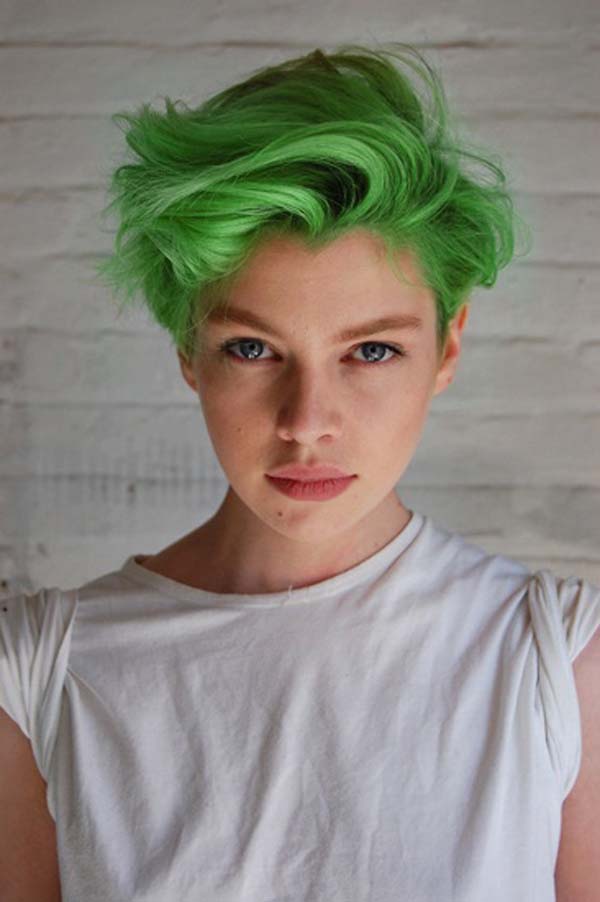
(source)
I’ve been thinking about doing this shade of green next on my own hair. I have green eyes and I think it would look really trippy. I’m going to use Electric Lizard to get this shade, but won’t dilute the dye with hair conditioner like I usually do. I want the full effect, no pastel shades this time!
Dainty Lilac
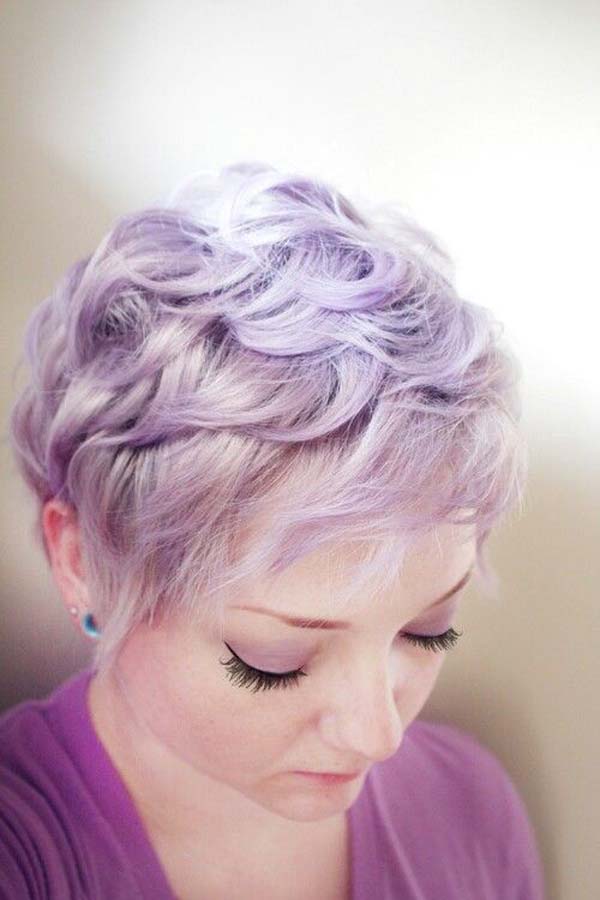
(source)
You could achieve this color with Mystic Heather and a lot of white conditioner. This looks like it has faded from a darker hue, but OMG I WISH MY HAIR HAD THAT TEXTURE. I love how this looks with a little bit of curl.
Rose Gold
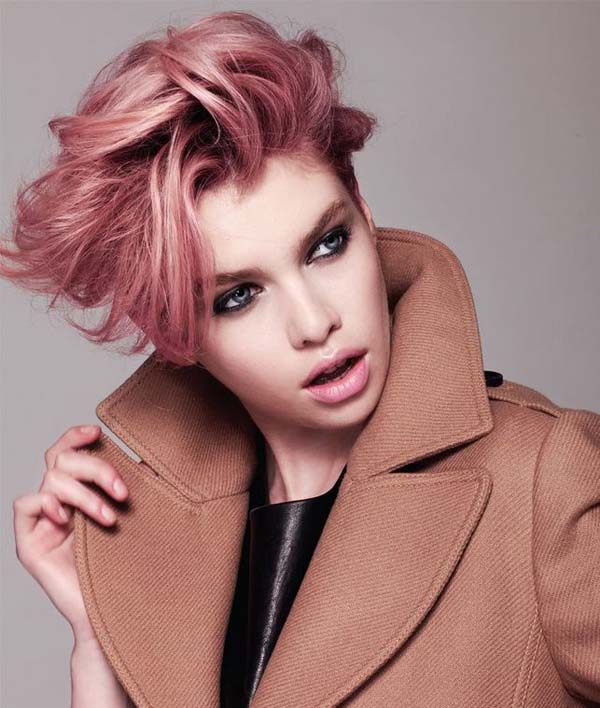
(source)
I’ve achieved this peachy pink color before by mixing Pretty Flamingo and Cotton Candy pink dyes together, then diluting the mix with hair conditioner. I love this color because it’s girly and fun, and pink fades quite quickly so you can do another color ASAP!
Which color is your favorite?
Get Your Blondest Blonde With Purple Shampoo
Tuesday, January 27th, 2015
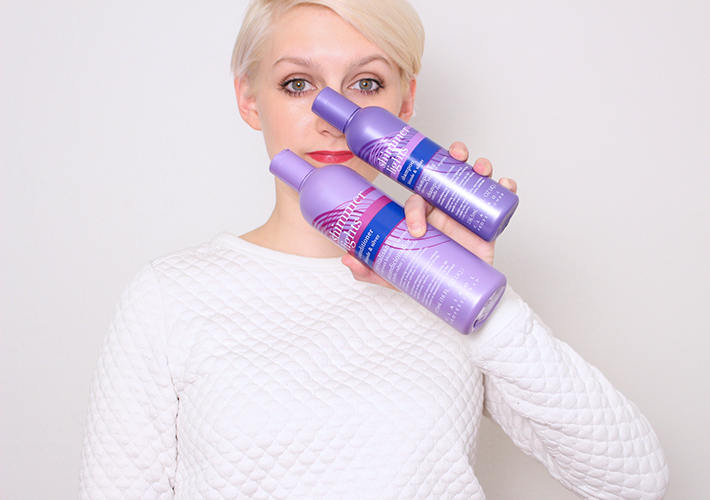
I went blonde in July of 2014, and I’ve never looked back. Well…expect to go pink, and purple, and blue. But white, Marilyn Monroe blonde is the go-to. However, not only does having platinum locks take a hefty amount of salon maintenance, but it also takes some at-home effort too. Bleach blonde hair is easily tainted by external conditions. For me, that’s New York City taxi fumes, the general smog around that lingers downtown, the dry winter weather and whatever water-born minerals don’t rinse out with each shampoo. No matter what elements of the environment might be making your blonde hair dull, I have the solution. Get your blondest blonde with purple shampoo.
There are an endless amount of blonde-friendly hair products on the market, but don’t spend your hard earned cash on complicated formulas and brand names. Instead, head straight to the beauty supply store and invest in a big bottle of Shimmer Lights shampoo, plus a bottle of conditioner. I love this shampoo, except for the nightmares it gives me based on this terrifying PBS Ghostwriter episode circa 1995. But I digress.
The science is simple. If your hair has yellow, brassy tones in it from whatever the f**k has attached itself to your hair, the cool purple tones will rinse that nasty gunk right out, giving you a white-blonde, Elsa from Frozen like hue. Even if your hair isn’t bleached, the Shimmer Lights shampoo and conditioner will clean out any dull yellow tones from your hair, giving you more of a Cinderella look than a banana colored Lady Gaga tone.
Here’s a few tips for application:
1. Use Shimmer Lights to tone just bleached hair.
After an at-home or salon dye job, your hair might be looking a bit more sunshine-like than preferred. Coat your hair in Shimmer Lights conditioner (NOT shampoo) for 3 minutes, and rinse clean.
2. Use Shimmer Lights to switch up your highlights.
If your highlights have a golden blonde tint to them, use Shimmer Lights to make a subtle change. If you don’t want ash-toned streaks forever, switch back to your regular shampoo and conditioner after a few washes.
3. Use Shimmer Lights to make natural blonde hair shine.
A little extra shine never hurt anybody. Even naturally blonde locks can get dull, especially in the winter. Switch to this shampoo and conditioner for an extra dose of clean color.
5 Pixie Cut Hairstyles You Can Achieve In 5 Minutes
Friday, December 5th, 2014
Ladiez are afraid of pixie cuts. It took me awhile to chop it all off, but now I could never go back. If you have a pixie cut, it might seem like there are only a few styles you can wear in your hair. INCORRECT! Presenting 5 pixie cut hairstyles you can achieve with only 5 minutes of work. Grab a hairbrush, some hairspray and a few bobby pins to get started.
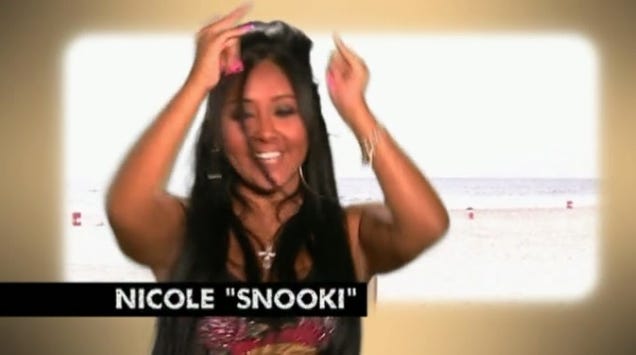
1. The baby bouffant.
Girls with pixie cuts can get away with the poof just a little bit more than girls with long hair. Instead of looking like Snooki circa the Jersey Shore pilot, pixie cut poofs look like Christina Hendricks in Mad Men.
This hairstyle is perfect for dirty hair days, when the short bits on the back of your hair are sticking up in random directions. Start by brushing the hair at the front of your head forward and spraying with hairspray.
After spraying at the crown of your head, brush it back for volume.
Style it to your taste. Here’s my finish product.
2. The swoopy bang.
This hairstyle is a girly version of Justin Bieber circa 2010, except for pretty and not the worst.
I part my hair dramatically to the left on the reg. If you have a dramatic side part on most days, part your hair slightly closer the middle. Then use a round brush to pull your bangs towards the opposite side. Tuck your hair behind your ears to finish it off. Easy as pie!
3. Slicked back sides.
Start this style by brushing your hair to the front, just like style #1. Then, use hair gel to slick back the sides of your hair.
Push back your hair so the ends pieces of your bangs are sitting on the crown of your head. Shape your hair using hairspray. Volume is key for this style.
4. Itty bitty braid.
The trick for this style is starting with a loose braid at the top and geting tighter as you braid towards the ear. I recommend practicing in your free time before trying on a school and/or work day. Choose a small section of hair towards your bangs, and twist a tiny braid. It’s like a sexy, modern beer maiden look. #Winning.
5. The hairspray finger wave.
This hairstyle requires you to wash your hair first. When your hair is wet, create a dramatic side part. Push the side with the most hair towards your part with your hands to create a finger-wave texture. After it’s dried about halfway, spray with hair-spray and continue to shape it. The end product should look a little something this like this…

Do you have any pixie cut hairstyle suggestions? Let me know in the comments.
Make A Sparkly Holiday Clutch With Just 3 Supplies
Friday, November 28th, 2014
Jazz up a freebie makeup bag with a sparkly mosaic made of old CDs. SO JAZZY. All you need is a bag, super glue and some old CDs.
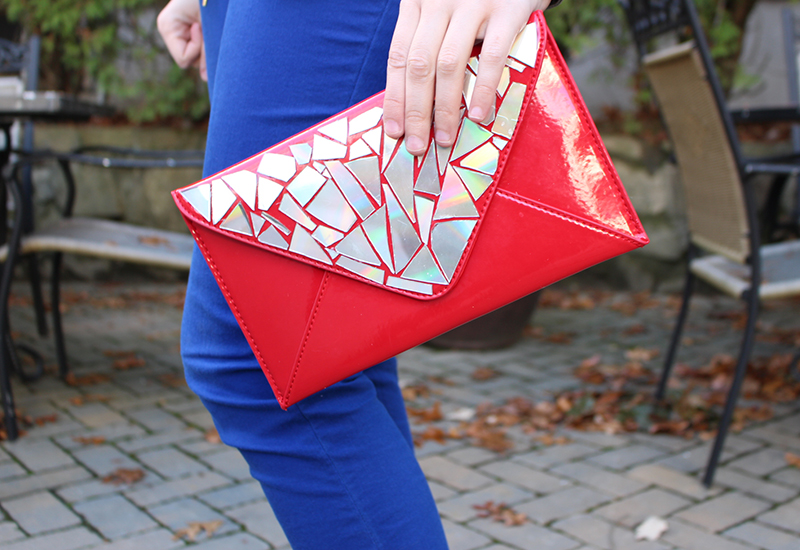
I found this red patent leather envelope clutch in the top of my closet. It appears to have come from a Clarin’s purchase with a free gift. I love the texture, but it needed a little personalization to really stand out.
In middle school I had a purse made of CD’s and duct tape. So using CDs as shiny mosaic pieces on the top flap felt very nostalgic and like, full circle or whatever. It also looks way cool and I spent a solid amount of time just staring at the finished product.
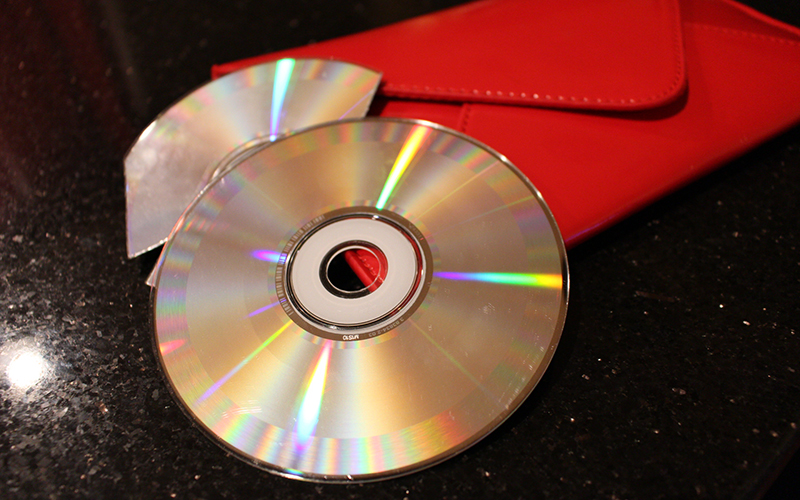
First, I cut up three CDs into pieces of varying sizes. Then I used super glue to attach them to the purse. The end. It was crazy easy.
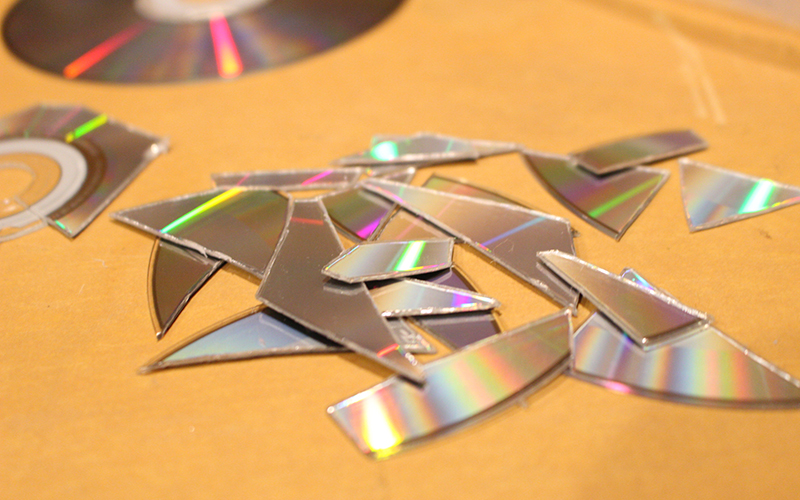
In case you were wondering, the CDs used were Jessie Ware’s “Devotion,” because I got it for free when I worked at MTV, Death Cab For Cutie’s “Plans” and Gavin DeGraw’s self-titled album for obvious reasons.
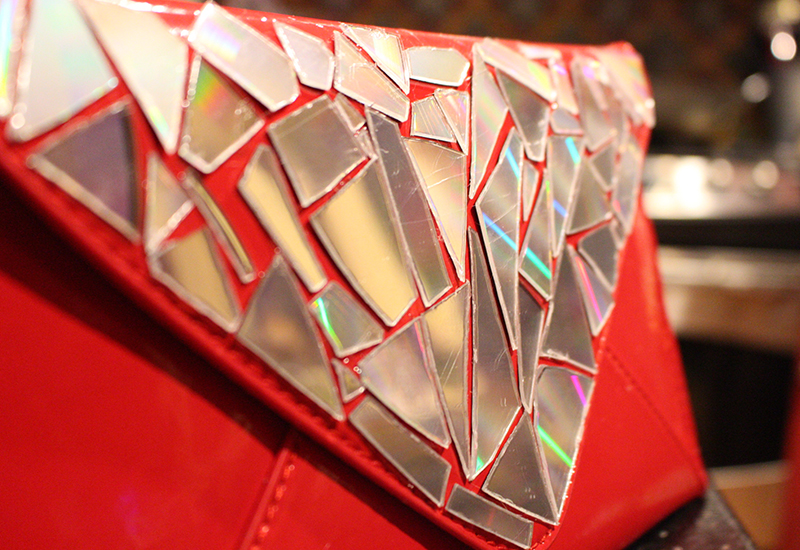
Let me know what you think of my sparkly clutch in the comments.
I Burned My Scalp With Hair Dye, Here’s What I Did After
Monday, November 24th, 2014
I love being blonde. I also love being pink and purple and blue and any other color that crosses my mind. But in order to get pastel colored hair you also need Marilyn Monroe’s bleached blonde locks. This past weekend, I went to a hair school to get my hair re-bleached, and it was a painful fiasco that’s left me with what feels like a bad sunburn on my scalp. My limited experience with chemical burns thus far: not fun.
I’m good at smiling.
Here’s a summary of how sh** went down. I went in without a picture of what I wanted the color to look like. My hair was still pretty blonde on the ends, though the roots had pretty much taken over. I pointed to the blonde part of my hair and said “I want this color but would be open to going a little bit lighter.” The student showed me a swatch labeled “natural beige blonde” and suggested that was the shade I wanted. I corrected him and pointed to the shade called “extra light blonde.” We seemed to be on the same page and he started the color process. Then he rinsed the dye from my hair, and the chaos began. Rather than a lighter shade platinum blonde, I had strawberry blonde locks, quite a bit darker than what I asked for.
Cue me being told it was my fault I didn’t clarify I wanted bleach and not color. To which I was like, “no.” Because I’m not the hairstylist, y’all should be able to figure out whether or not you need bleach or not when I showed you the exact color I wanted my head to be, because it was ALREADY ON MY HEAD. But, hair school. I knew this was a possibility.
The teacher directed the student to mix up bleach for my hair. He applied the bleach, and the burning I felt was the most intense pain I’ve ever felt in my life. I was shaking, pacing, grabbing at my face and asking every 2 minutes if they could rinse it off yet. In the moment I wasn’t thinking “this could potentially burn my scalp” because I can’t say I’ve ever had to consider the possibility of chemical burns before, and it didn’t cross my mind. I was thinking “I need to get through this because I want white blonde hair.”
Eventually I couldn’t take it anymore and the stylist rinsed it off. Even after it was completely rinsed out, my head was still burning. They applied bleach again, avoiding the scalp. When the burning died down, they applied a sensitive skin formula of bleach that didn’t burn and put me under a heater.
Overall, I was at the hair school from 9am to 2:30pm. I left with gorgeous white blonde hair, a tender scalp, and a brain full of nerves because I was like, “there’s probably a chance my hair is going to fall out.”
After 5 hours passed and a still tingly head, I reached out to two of my hairdresser friends (thanks Kathryn and Brittany). Taking their advice, I learned a few things about proper hair bleaching and how to take care of a tender, chemically burned scalp.
You should never do that many color processes in a day.
I think this one is pretty much common knowledge. I trusted my hair stylist, even though they were a student… but I probably should have said “f**k it” and come back another time for the bleach process.
Don’t use heat with bleach lightener.
The lovely Kathryn told me that using bleach with heat is a bad, bad idea. If my stylist suggests using heat with bleach again, I’ll say “no thanks.” I’ve had it bleached without heat before, so I know it’s possible.
Don’t wash your hair before an intense process.
I washed my hair the night before, and there were no natural oils to protect my scalp from the chemicals. Skip out on washing your hair before getting it dyed.
After the damage was done, here’s what I did:
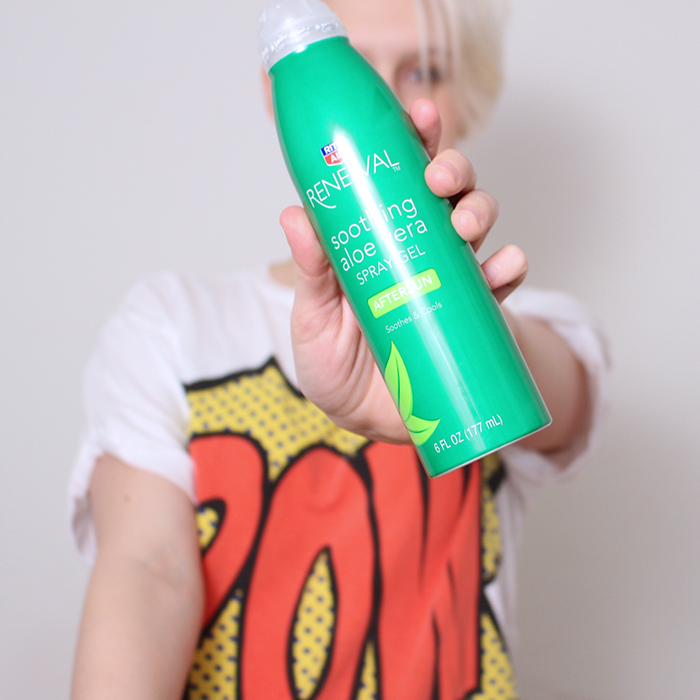
1. Treat your scalp like a regular burn.
I bought aerosol Aloe Vera from Rite Aid for around $9. I lifted up sections of my hair and sprayed it onto my scalp.
2. Don’t wash your hair for a few days.
Let your scalp chill out and rebuild it’s natural oils. You can rinse with cold water to remove product buildup, but don’t use shampoo. I’ve always been an every day hair-washer, but this experience may change my habits forever. To avoid rinsing out too much good stuff, I’ve been wearing a shower cap up until the very end of my shower.
3. Avoid putting a lot of stress on your hair to avoid breakage.
I’ve been brushing my hair very, very softly out of fear of losing my hair. I have short hair, so I can’t put it up in a ponytail, but I’d avoid rubber bands as they may pull on weak hair follicles.
Have you ever dealt with chemical burns from hair dye? Let me know in the comments.
Tutorial: Get Pastel Ombré Hair At Home
Monday, November 3rd, 2014
Last week, my dear friend and Cheap Bitch contributing writer Hannah let me give her pastel purple ombré hair. She’s a brave soul, letting me touch her Manic Panic virgin locks. But it turned out SICK (like, good sick, not gross sick) and here’s how I did it.
It’s worth noting that Hannah’s hair is not naturally blonde. We didn’t use any bleach on her hair before coloring it, but her hair had been previously dyed by a professional. If your hair is naturally this light, you may need to leave the dye on for a longer period of time, as your hair will not be as porous as chemically lightened hair.
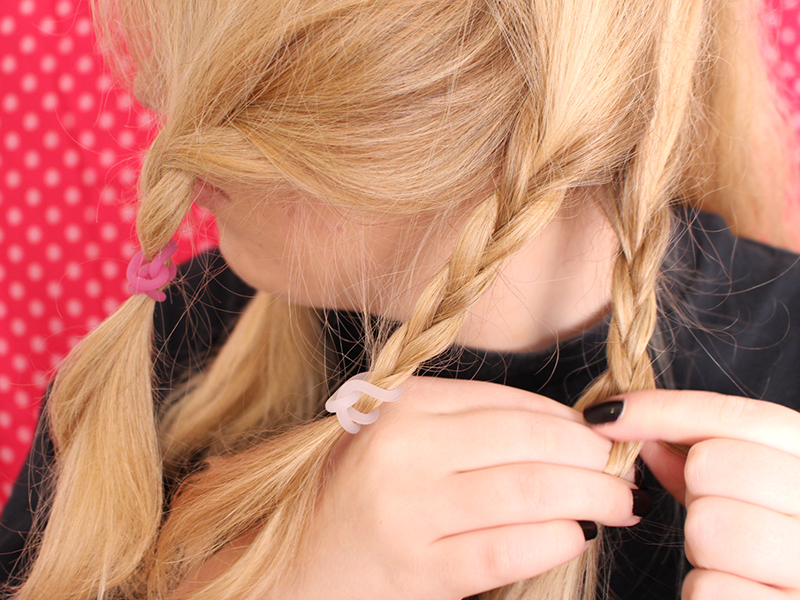
First, Hannah and I team-worked on braiding her hair into small sections. We tied the braids with soft hairbands at the point where she wanted the ombré to end. We tied her hair into braids instead of ponytails so the purple faded into the blonde, versus creating a flat line where the purple ended.
Next, we mixed up our dye using Manic Panic Cotton Candy, a tiny dab of Ultra Violet (this sh** is intense, so be careful with it if you’re looking to achieve more pink than purple) and diluted it to a pastel color with white hair conditioner.
Then we applied the dye from the ends of her hair to the hairbands. Since Hannah’s hair is super thick, I applied several coats and rubbed each section between the palms of my hand to make sure it was fully saturated.

We let Hannah’s dye sit for 40 minutes. I then removed the hairbands. When you pull the hairband over the dyed section of hair, it removes the light-colored remnants of dye and conditioner. The dye and conditioner is lighter because the pigments have attached to the hair. It’s a good sign!
I used these less-concentrated dye leftovers at the top of each ombre section to create a natural looking fade. I ran my fingers through each section and let the dye sit for another 15 minutes.

Then I rinsed and blow-dried Hannah’s hair. I felt like a fancy hair dresser. It was fun. Here’s the final results:
So much sass. Can’t handle. **Dead**.
What do you think of Hannah’s ombre ends? Let us know in the comments.
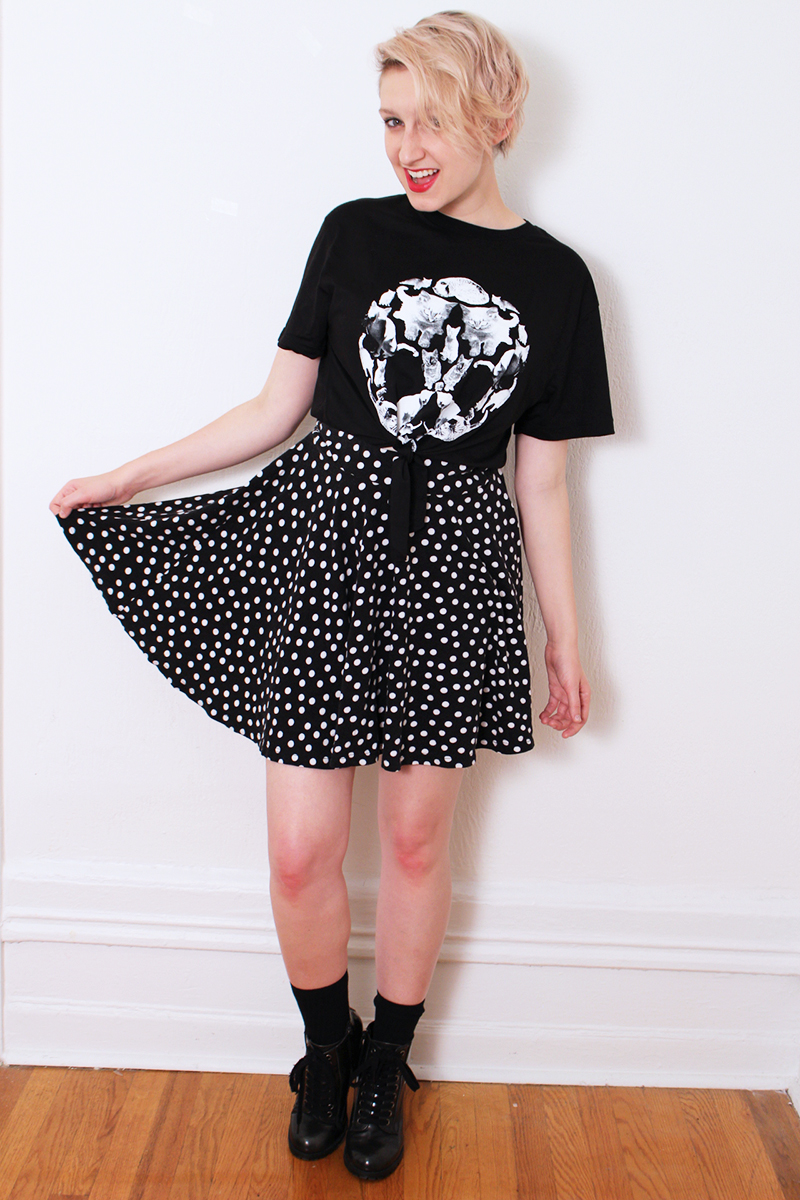
This Is A No-Sew T-Shirt DIY That Isn’t A Crop Top
Tuesday, October 28th, 2014
Literally every single t-shirt, no-sew DIY on the internet is a crop top. This one isn’t. It can be if you want it to be! But…I mean it’s almost November. Do you live in Florida or L.A.? Then you’re allowed to make it a crop top. If not, that’s just silly. This is my blog so what I say goes.
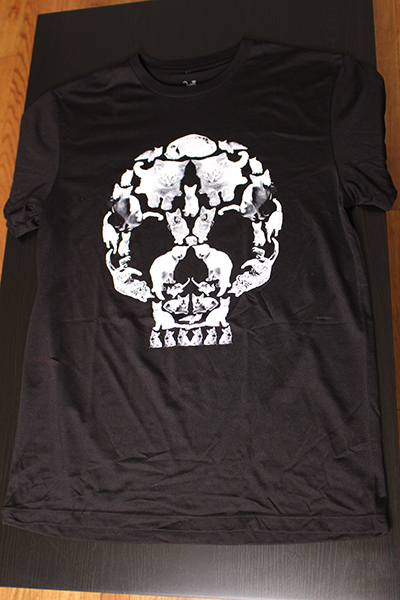
A few days ago my lovely roommate Kristen, who subscribes to Loot Crate, gave me this Halloween, unisex graphic t-shirt with a skull on it. But when you look closer, THE SKULL IS MADE OF PICTURES OF CATS! Mind blown. Kristen knew I love me some cat t-shirts and handed it over.
The shirt was a little bit big, so I scoured the internet for an easy way to make it look sleek that required no sewing. And when I think “sleek,” I don’t think t-shirt with the sleeves and bottom portion cut off. So a surfer-girl, sixteen-year-old-with-the-abs-of-a-spartan-boy crop top wasn’t going to fly.
So here’s how I created a tie-front, regular ol’ length top our of a baggy unisex t-shirt. I slightly modified this tutorial, so thanks for helping me out.
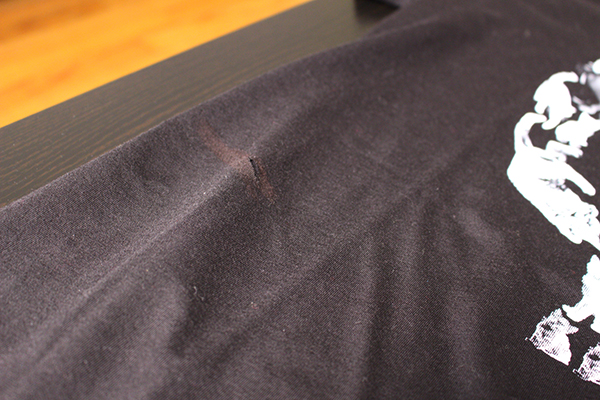
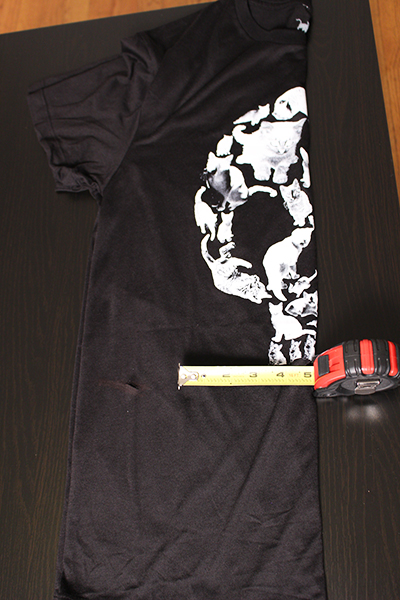
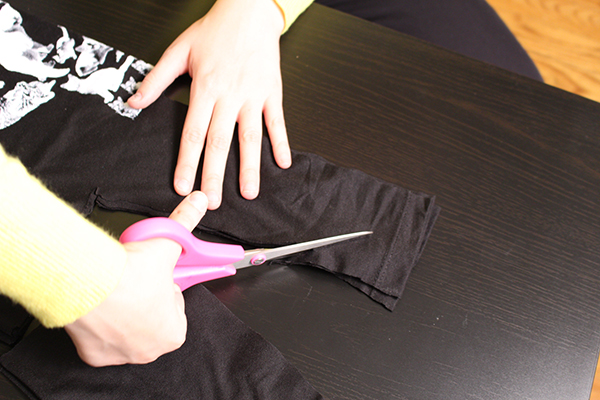
First, I put the shirt on and marked with a Sharpie where I wanted it to cut off. I chose right where my jeans ended. Since the shirt was black, I couldn’t see the mark very well. When I was ready to snip, I made a tiny cut with an x-acto knife so I could see my cut-off point more clearly.
 I folded the shirt in half and measured five inches away from the fold.
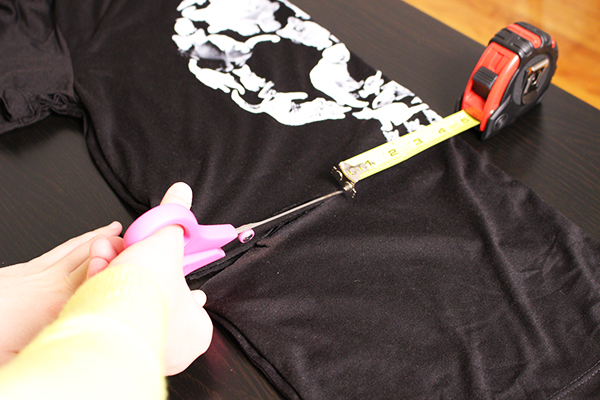
 I cut the t-shirt bottom off, until I hit the end of my measuring tape.
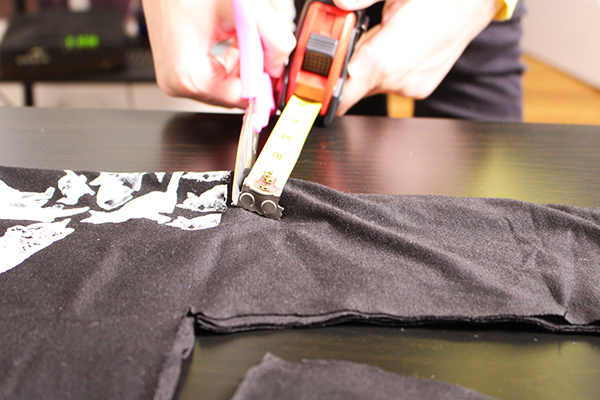
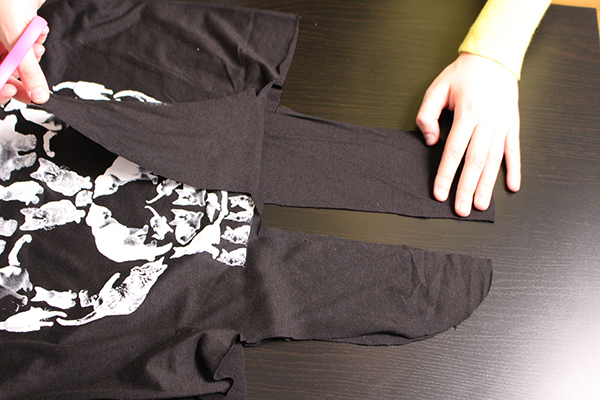
 Then I cut down, towards the bottom of the shirt in a straight line from the end point of my first cut.

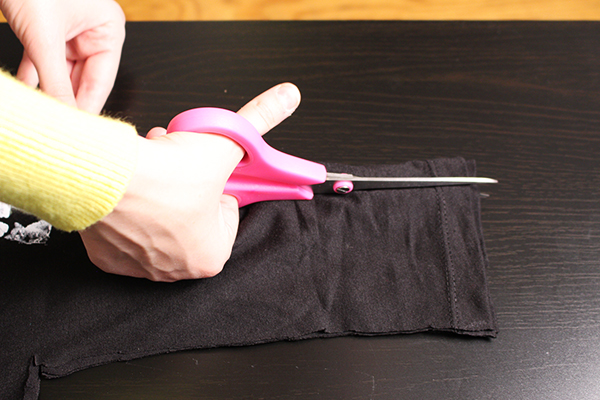
The fabric left attached to your shirt will become the ties. Measure one inch away from the fold of the shirt. Starting at the fold, cut to the end of the measuring tape.
Cut in a straight line towards the bottom of the shirt once again.
You’ll be left with a “tail” on the of your shirt. Cut the outside edges (away from the fold) into a rounded shape.
Here’s your result! Now you’ll need to cut off the extra fabric from the back. Flip the front part of the ties up to avoid cutting into your ties.
Now cut that off.
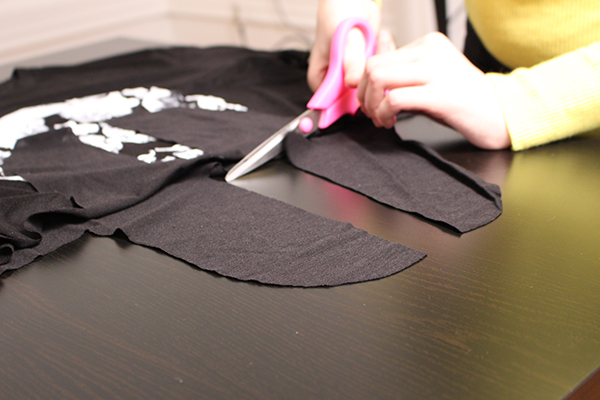
Measure about one inch from the top of your ties. Cut a rounded square into top, to leave room for your knot to sit.
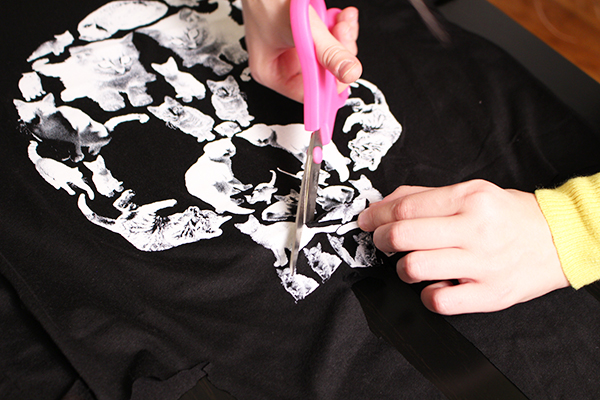
Make it look like this, because I’m the queen of everything and I told you to!

Now tie it up, tuck it in, do your thang and be proud of yourself for not totally screwing it up. I honestly can’t believe I didn’t.